Shadow Ticket, Ten Shadows Ticket, and ??? Ticket searches refer to the item documented as Secret Ticket in the July 2026 route. That recording links Summer Island event bosses to Shadow Island access. It does not prove the ticket is still obtainable from those bosses today. Read the live reward panel and the travel NPC's Shadow Island prompt before farming or spending the item.
After current UI confirms access, the practical Ten Shadows loop is: obtain the technique, reach Shadow Island, complete Megumi's opening objectives, gather Shadow Essence, summon Shikigami encounters at the altar, and spend each Shikigami's matching materials on its own mastery path.
Source check on September 6, 2026: Roblox now lists the Infinite Void update, and the developer board is labelled Updating. Neither establishes a new ticket source. The routes below retain their dated evidence; ticket odds, essence costs, timers, and current unlock requirements still need confirmation in your server.
The Whole Route in Six Steps
Do not farm randomly before you know which stage you are on. Each step opens the next decision, and mixing altar materials, island access, and mastery goals makes it easy to spend resources without advancing the summon you actually want. Finish the access work first, then move into a repeatable essence and encounter loop.
 Official media
- Technique
- Ten Shadows
- Progression hub
- Shadow Island
- Questgiver
- Megumi
- Core resource
- Shadow Essence
- Encounter trigger
- Shikigami Altar
- Latest public check
- September 6, 2026 · Infinite Void listing
- 01Obtain Ten Shadows
Use the current Technique Banner route and Cursed Crystals; confirm the technique appears on your account before farming its island.
- 02Verify island access
The item searched as Shadow Ticket is documented as Secret Ticket. Confirm that the live client still offers it before using any historical farm route.
- 03Travel from Jujutsu High
Use the Shadow Island NPC near the main Jujutsu High area and read the confirmation before consuming access.
- 04Complete Megumi's opener
Find Megumi, shatter the three shadow pillars, then collect the marked Shadow Essence objectives.
- 05Use the Shikigami Altar
Gather enough currently displayed essence, activate the altar, and defeat the Shikigami encounter it starts.
- 06Upgrade the matching tree
Keep each Shikigami's tags and materials with that summon; repeat only for the mastery branch you are building.
Step 1: Get Ten Shadows Before Farming the Island
Current progression demonstrations obtain Ten Shadows from the technique banner using Cursed Crystals. Open the live Technique Banner, confirm that Ten Shadows is present in the pool or featured path shown to you, and read the current confirmation before rolling. Do not use an old pity number or probability unless the live screen displays it; the banner interface changed in the Sukuna update.
Stop once the technique is visibly owned and equip it long enough to confirm its page, actions, or progression prompt exists. A screenshot of another player's banner does not prove your current server is using the same version. If Ten Shadows is absent, recheck the official update state instead of spending in a different banner and hoping the result transfers.
How to Get the Ten Shadows Ticket and Reach Shadow Island
The item players search for as a Shadow Ticket is documented as the Secret Ticket. In the July 2026 Summer Event build, the developer history and playable footage tied it to periodic bosses on Summer Island, then to the Shadow Island travel NPC at Jujutsu High. That is historical, version-bound evidence—not a promise that the current server build still uses the same boss reward.
The September 6 official Infinite Void listing does not publish a ticket source, and the developer board is still labelled Updating. Before farming, inspect the live event or boss reward UI for the exact Secret Ticket name. A July 11 recording showed a travel confirmation spending one item labelled ??? Ticket; its consumption rule is historical too. If the current reward panel does not name the ticket, stop that farm and check the official community. Once live UI confirms access, use the NPC whose prompt explicitly names Shadow Island.
- Use Secret Ticket as the documented item name; Shadow Ticket is a search nickname.
- Treat Summer Island boss farming as a July 2026 historical route until the live reward UI confirms it.
- Read the current travel prompt to learn whether access consumes an item or unlocks permanently.
- Do not publish or trust an old drop rate, boss timer, shop price, or guarantee.
How to Get Shadow Essence in Jujutsu Zero
Recent route evidence agrees on two opening jobs from Megumi: destroy three shadow pillars around the island, then collect the marked Shadow Essence objectives. Track the active quest and complete one objective type at a time. Use the quest counter, marker, or completion message as proof; do not assume that striking an unmarked prop advances the task.
For the pillars, circle the island from a fixed landmark and keep the same direction so you do not revisit the first target. If a pillar appears immune to a technique, read the objective and test basic attacks rather than assuming the quest is broken. For essence collection, follow the current markers and confirm the counter changes after each pickup. Exact health, collection counts, and reward quantities are omitted because current sources do not support one stable number strongly enough.
Step 5: Turn Shadow Essence Into Shikigami Encounters
The Shikigami Altar converts the island's progression resource into a fight. Approach it only after the live interface shows enough Shadow Essence for the current summon cost. Read the prompt, note what is consumed, and make sure your active build can handle a boss-style encounter before confirming. The altar loop is the bridge between gathering and mastery; essence sitting in inventory does not upgrade a summon by itself.
Treat the first encounter as reconnaissance. Identify which Shikigami appeared, what the result screen names, and which materials entered your inventory. One successful drop confirms that material can appear in that run; it does not establish a percentage. If the altar can produce different encounters, plan multiple attempts and preserve materials even when they are not for the branch you are upgrading today.
- Check the live essence cost before every summon.
- Clear inventory space and note the starting material count.
- Record the Shikigami name and result screen together.
- Do not convert a small sample into a drop-rate claim.
Step 6: Upgrade One Shikigami Path at a Time
Each Shikigami uses its own mastery path and matching encounter materials in the current route evidence. Open the tree for the summon you actually use, inspect the next visible node, and identify its exact material requirement. Farm toward that one node before spreading effort across every branch. This produces a usable improvement sooner and makes it obvious which encounter should be repeated.
Keep unmatched tags and materials. A drop from one Shikigami should not be assumed to upgrade another, and deleting or trading an unfamiliar item can create a second grind later. After buying a node, test the summon in the same baseline encounter used before the purchase. Record what visibly changed; do not infer a hidden multiplier when the tree only changed behavior or access.
Part 2, Megumi Raid, and Mahoraga
Two independent gameplay videos published on August 1 confirm that the Ten Shadows Part 2 content and the Megumi or Shadow Sorcerer raid existed in that build. They also make the topic's player demand clear. However, public evidence is not strong enough to publish one guaranteed current raid level, full crate table, or exact Focus, Aggro, and Adapt control scheme. Those details remain outside this step route until they can be reproduced or cross-verified.
Use the existing Ten Shadows Part 2 field file for the named features and the raids guide for preparation. If your live client shows a level gate or raid reward, capture the complete prompt and patch title. The previous Sukuna update explicitly said Ten Shadows received fixes, and the newer CT Buffs update may have changed technique behavior again, so Part 2 footage can no longer be treated as current by default.
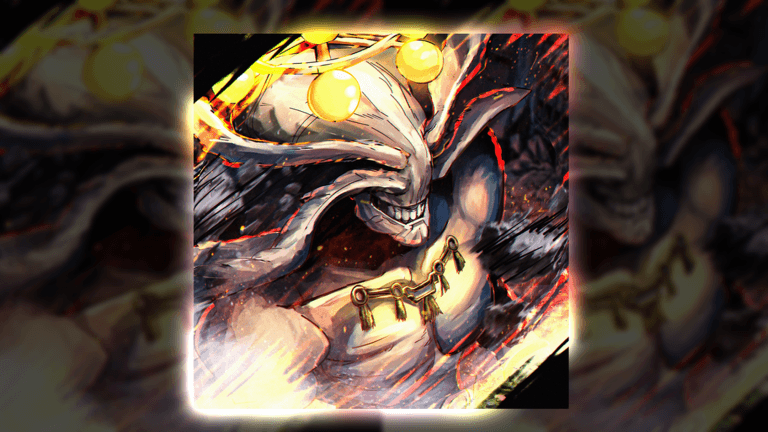 Official media
- Confirmed in dated August 1 gameplay: Part 2 and the Megumi/Shadow Sorcerer raid existed in that build.
- Not yet confirmed strongly enough: one universal level gate or complete reward pool.
- Not yet documented: exact Mahoraga Focus, Aggro, and Adapt controls after fixes.
- Always compare Part 2 footage with the current game client.
Fast Progress Without Fake Drop Rates
Efficiency comes from reducing wrong-stage work, not from copying an unverified timer. Confirm access, finish Megumi's opener once, pick one mastery target, and repeat only the activity that supplies its visible requirement. If a required encounter is unavailable, rotate to essence gathering or another confirmed branch instead of waiting while doing nothing.
Server switching can change availability, but it can also place you in a different hotfix state or interrupt quest tracking. Before using it as a farm tactic, make sure the quest is saved and compare the version or interface after joining. Keep a simple run log with the Shikigami, material, and completion result. That will reveal your real bottleneck without pretending a handful of runs proves a global rate.
Recheck this route after any official Ten Shadows note. The overall loop may remain stable while costs, ticket sources, encounters, or mastery nodes change. A dated step guide should update the volatile field, not force players through an obsolete number because the page title still ranks.